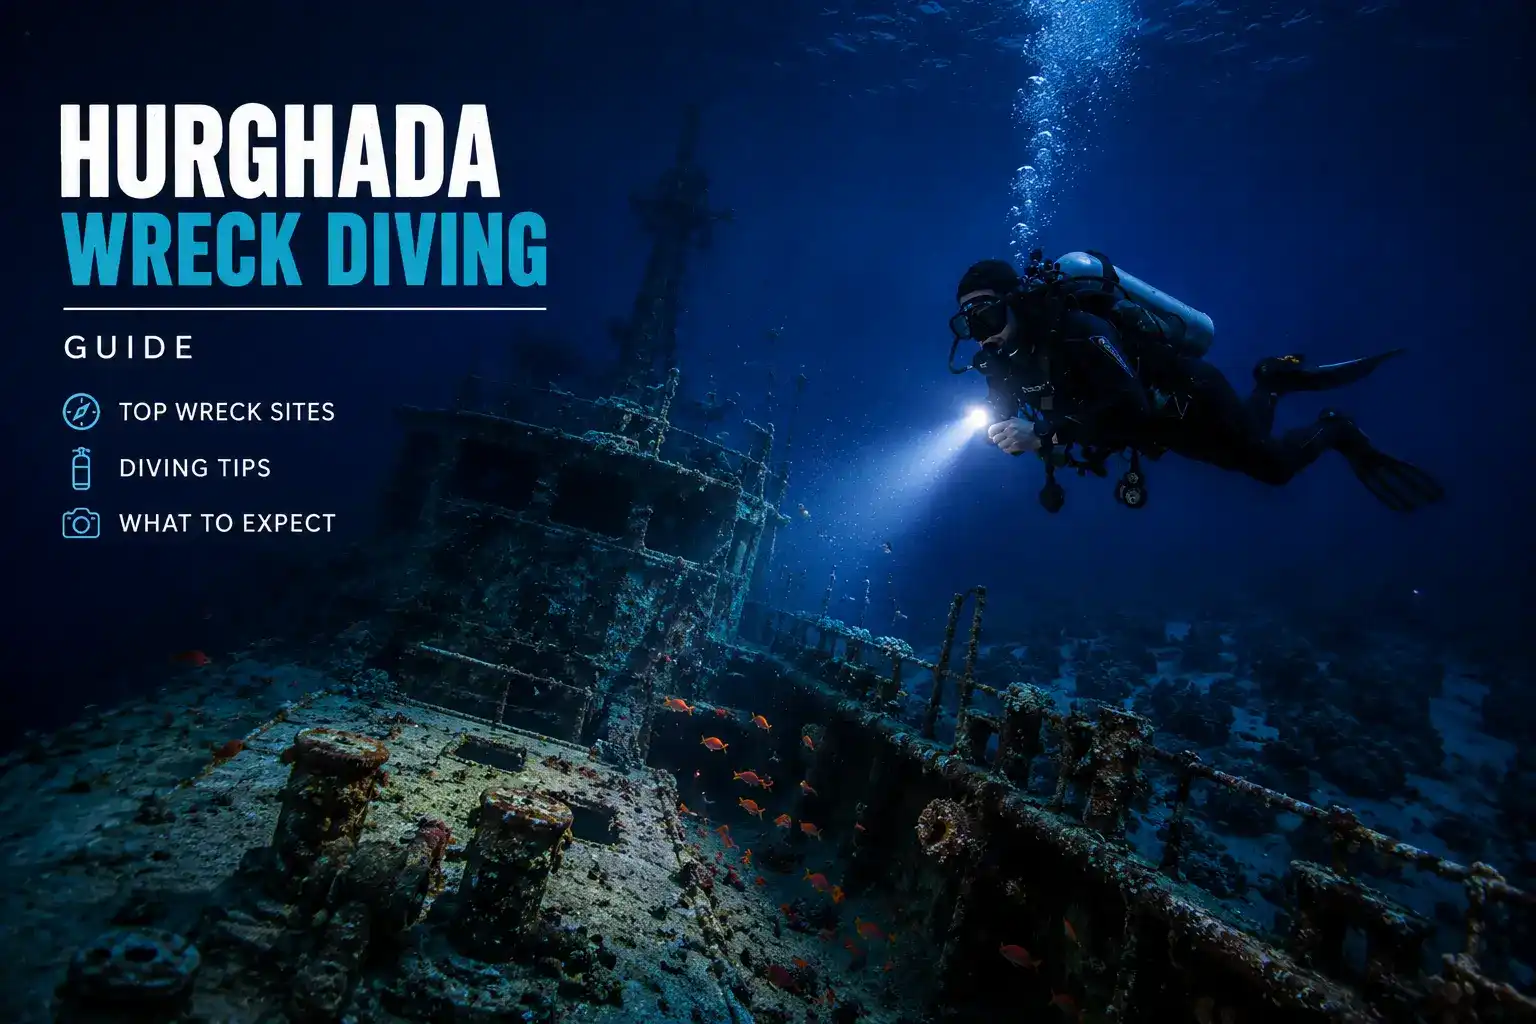
SS Thistlegorm: The World's Most Famous Wreck Dive
The SS Thistlegorm is not just a shipwreck. It is a time capsule, a war grave, and an artificial reef that has been accumulating marine life for over eight decades. Built in Sunderland, England in 1940 by Joseph Thompson & Sons, she was a 128-metre, 4,898-tonne British armed merchant ship. Her name means "Blue Thistle" in Scottish Gaelic, a reference to the thistle, Scotland's national flower. She completed three successful voyages before her fourth and final journey ended in the Red Sea on 6 October 1941.
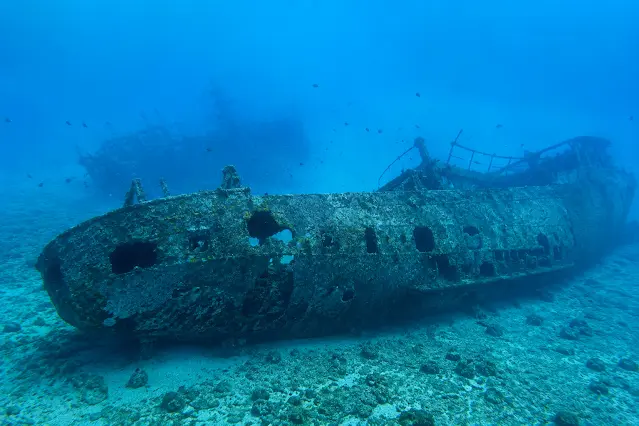
Today, the Thistlegorm is consistently ranked among the top ten wreck dives in the world. Over 100,000 divers visit her every year. She sits upright on a sandy bottom at 30 metres depth, her bow facing southwest, split into two main sections by the catastrophic explosion that sank her. The shallowest point is 15 metres, the deepest is 32 metres at the propeller. This depth range makes her accessible to Advanced Open Water divers while still offering enough complexity to reward experienced wreck divers with multiple visits.
What makes the Thistlegorm exceptional is not just the wreck itself, but the cargo. This was a supply ship carrying military equipment to the British 8th Army in North Africa, and much of that cargo is still visible, still identifiable, and still arranged in the holds as it was loaded in Glasgow in June 1941. Trucks, motorcycles, rifles, Wellington boots, aircraft parts, and two steam locomotives are scattered across the seabed and inside the holds. Diving the Thistlegorm is not exploration, it is archaeology.
The History: How the Thistlegorm Met Her End
The Final Voyage
The Thistlegorm departed Glasgow on 2 June 1941, carrying a cargo that reads like an inventory of mid-20th century military logistics: Bedford trucks, BSA motorcycles, Universal Carrier armoured vehicles, Bren guns, cases of ammunition, .303 rifles, radio equipment, Wellington boots, aircraft parts, railway wagons, and two LMS Stanier Class 8F steam locomotives complete with coal and water tenders. The locomotives were carried as deck cargo, intended for Egyptian National Railways. The rest was for the Allied forces in Egypt, then the Western Desert Force, which became the British 8th Army in September 1941.
Because German and Italian forces controlled the Mediterranean, the Thistlegorm sailed as part of a 16-ship convoy around the Cape of Good Hope, stopping in Cape Town for fuel. The light cruiser HMS Carlisle joined the convoy there. The route added thousands of miles to the journey but was the only safe passage. After entering the Red Sea, the convoy was delayed at Safe Anchorage F, near Sha'ab Ali, because a tanker had struck a mine in the Suez Canal and traffic was backed up. The Thistlegorm dropped anchor and waited.
The Attack
On the night of 6 October 1941, two German Heinkel He 111 bombers from Kampfgeschwader 26 were dispatched from Crete. Their original mission was to locate and destroy the troopship Queen Mary, which German intelligence believed was in the area. They failed to find her. Returning to base with bombs still aboard, they spotted the Thistlegorm at anchor, the largest ship in the anchorage, and dropped two 2.5-tonne high explosive bombs.
Both bombs struck Hold 4 near the stern at 01:30. The explosion detonated the ammunition stored in the hold, creating a chain reaction that tore the ship apart. The Thistlegorm sank in under two minutes. Nine of the 49 crew aboard were killed, four merchant sailors and five DEMS gunners. The remaining 40 survivors were rescued by HMS Carlisle, which was anchored nearby. Captain William Ellis was awarded the OBE for his conduct during the disaster.
Rediscovery
The wreck remained undisturbed for 14 years until Jacques Cousteau and his team aboard Calypso rediscovered it in 1955. Cousteau explored the wreck, salvaged some items including the captain's safe, the ship's bell, and a motorcycle, and published photographs in National Geographic in 1956. He kept the exact location secret, and the wreck remained largely unknown to recreational divers until the early 1990s, when GPS technology made it easy to relocate. By 1995 it was on every Red Sea dive operator's itinerary. Today it is the most-dived wreck in the world.
| Built | 1940, Sunderland, England |
|---|---|
| Length | 128 metres / 415 feet |
| Gross Tonnage | 4,898 GRT |
| Sunk | 6 October 1941, by German bombers |
| Location | Safe Anchorage F, Strait of Gubal |
| Depth Range | 15–32 metres |
| Orientation | Upright, bow facing S40°W |
| Condition | Split in two, midship section destroyed |
| Rediscovered | 1955 by Jacques Cousteau |
| Access | Day boat from Hurghada (3–4 hours) or liveaboard |
Diving the Thistlegorm: What to Expect
Getting There
The Thistlegorm lies in the Strait of Gubal, approximately 40 kilometres from Sharm El Sheikh and accessible from Hurghada by day boat, though the journey is long, 3 to 4 hours each way. Most divers experience the Thistlegorm as part of a liveaboard itinerary, which allows multiple dives on the wreck and the option of a night dive. Day trips from Hurghada are possible but exhausting, two dives on the wreck with surface intervals on the boat and a return journey that puts you back at the marina after dark.
The Dive Plan
The standard approach is a clockwise circuit around the wreck, starting at the stern, moving along the port side, exploring the holds, and returning along the starboard side. Currents are tidal and can be strong, flowing from northeast to southwest, from stern to bow. The dive briefing will cover the current direction and strength for the day, and the plan will be adjusted accordingly. A typical dive lasts 45–50 minutes, with most divers spending the majority of their time at 20–25 metres.
The Bow Section
The bow is the shallower and more intact section. The deck gun is still mounted on the stern, visible from the surface on a calm day. The anchor winch and chains are draped across the deck. Hold 1, forward of the bridge, contains the most photogenic cargo: rows of BSA motorcycles stacked like they were rolled into position yesterday, though they are now encrusted with coral and home to batfish and lionfish. The motorcycles are the iconic image of the Thistlegorm, and every diver who visits takes the same photograph. It is worth it every time.
The Blast Area
The midship section is where the bombs struck, and it is largely destroyed. The explosion blew the superstructure apart, and the debris field extends across the seabed. This is where the two steam locomotives came to rest. One lies off the port side, level with the blast area. The other is off the starboard side, near Hold 2. Both are surreal sights, 70-tonne machines sitting on the sand at 30 metres, their wheels and boilers still recognisable. The locomotives were carried as deck cargo and were thrown clear of the ship by the explosion.
The Stern Section
The stern is deeper and more damaged than the bow, but it contains some of the most interesting penetration routes. The propeller sits at 32 metres, the deepest point of the dive. The rudder is frozen at a slight angle. Inside the stern holds, you can find trucks, armoured vehicles, and stacks of ammunition boxes. The penetration routes are not technical in the sense of cave diving, but they are overhead environments that require training, experience, and a guide who knows the layout. Silt is easily disturbed, and visibility inside the holds can drop to zero if divers are careless with their fins.
Penetration Diving
The Thistlegorm is not a penetration dive for beginners. The holds are large, but they are dark, silt-filled, and structurally unstable in places. A Wreck Diver specialty is recommended, and experience with line reels and lost-diver procedures is essential. The most common penetration routes are through Holds 1 and 2, which contain the motorcycles and trucks, and through the stern section. A guide who knows the wreck is not optional for first-time penetrations. The unofficial standard route is anti-clockwise, entering the forward holds and exiting through the blast area or vice versa, depending on current.
| Minimum Certification | Advanced Open Water (or equivalent) |
|---|---|
| Recommended Experience | 20+ logged dives, comfort in currents |
| Depth Range | 15–32 metres |
| Current | Tidal, moderate to strong |
| Visibility | 15–30m, reduced by silt |
| Dive Time | 45–50 minutes typical |
| Nitrox Recommended | Yes, extends bottom time significantly |
| Penetration | Wreck Diver specialty recommended |
| Best Access | Liveaboard (multiple dives) |
The Cargo: What You Will Actually See
The Thistlegorm's cargo was not random. It was a carefully loaded military resupply for the British 8th Army, and much of it is still in place, preserved by the Red Sea's warm, saline water. Here is what remains visible on a typical dive.
Hold 1: Motorcycles and Boots
The forward hold contains the most photographed cargo on the wreck: rows of BSA motorcycles, stacked against the walls and across the floor. They are not in riding condition, but they are recognisably motorcycles, with wheels, frames, and fuel tanks. Some have coral colonies growing on them, others are relatively clean. The hold also contains stacks of Wellington boots, thousands of pairs, still in their boxes. The rubber has degraded, but the shape is unmistakable. This is the hold that sells the Thistlegorm to non-divers, the image of motorcycles underwater is iconic.
Hold 2: Trucks and Aircraft Parts
Hold 2 contains Bedford trucks, some upright, some on their sides, and aircraft parts including wings and propellers from Westland Lysander and Bristol Blenheim bombers. The trucks are the most impressive single items in the hold, their cabs and cargo beds still intact, though the tyres have rotted away. The aircraft parts are more scattered, but the radial engine exhaust rings and cylinders are identifiable to anyone familiar with aviation history. This hold requires more careful navigation than Hold 1, the layout is less regular and the debris is more spread out.
Hold 4: The Blast Zone
Hold 4 is where the bombs struck, and it is now an open crater rather than an enclosed space. The explosion destroyed the cargo and much of the ship's structure, and what remains is a debris field of twisted metal, ammunition boxes, and unidentifiable fragments. The two steam locomotives that were carried as deck cargo landed here, one off the port side and one off the starboard. They are the most surreal sight on the wreck, full-sized railway engines sitting on the seabed, their wheels and boilers intact, their smokestacks pointing toward the surface.
Deck Cargo and Superstructure
The deck still carries the anti-aircraft gun mounted on the stern, the ship's bell (a replica, the original was salvaged by Cousteau), and various winches, bollards, and railings. The bridge is collapsed but recognisable, and the captain's quarters are accessible to experienced penetration divers. The ship's safe, which Cousteau salvaged in 1955, is now in a museum in Toulon, France. The superstructure is encrusted with coral and sponge, and the resident marine life has made every overhang and crevice its own.
Marine Life on the Thistlegorm
The Thistlegorm is not just a historical site. It is an artificial reef that has been accumulating marine life for over 80 years, and the biodiversity is now comparable to natural reefs in the area. The ship's structure provides habitat complexity that natural reefs cannot match: vertical walls, horizontal decks, enclosed holds, and open sand patches. This variety supports a wide range of species.
Resident Species
Giant moray eels are common, particularly in the stern section where the structure is most complex. Crocodilefish lie flat on the deck, their camouflage so effective that they are often missed until they move. Lionfish occupy every overhang and shadowed corner. Schools of batfish hover around the mast and superstructure, their disc-shaped bodies catching the light. Barracuda and jacks patrol the open water around the wreck, and a resident turtle is occasionally seen grazing on the deck cargo. Nudibranchs, particularly chromodoris species, are common on the coral-encrusted railings.
Seasonal Visitors
In summer, whale sharks have been reported passing through the Strait of Gubal, though sightings at the Thistlegorm itself are rare. Oceanic whitetip sharks are more common in autumn, particularly October and November, when they patrol the open water around offshore sites. Hammerhead sharks are not typical at the Thistlegorm, they prefer deeper walls and drop-offs, but they have been reported on early morning dives in late summer.
Coral and Sponge Coverage
The steel structure is encrusted with soft corals, sponges, and hydroids. Dendronephthya soft corals, the tree-like pink and purple colonies, cover the railings and superstructure. Tube sponges grow from the deck plates. The coral coverage is thickest on the upper sections, where light is strongest, and thins toward the deeper holds. The wreck is a designated war grave, and divers are reminded that the marine life is as much a part of the site as the cargo. Touching coral, even accidentally, damages decades of growth.
Abu Nuhas: Four Wrecks on One Reef
Abu Nuhas is a different kind of wreck site. Where the Thistlegorm is a single, massive, historically significant ship, Abu Nuhas is a shallow reef that has claimed four merchant vessels over the decades, and every one of them is now an underwater world worth a full tank. The reef sits at the northern entrance of the Gulf of Suez, approximately 45 kilometres northwest of Hurghada, in the middle of a busy shipping lane. The name means "Father of Brass" in Arabic, a reference to the brass fittings of the ships that have wrecked here.
The four wrecks are the Giannis D, the Carnatic, the Chrisoula K, and the Kimon M. They lie at depths of 10–30 metres, all on the same reef, and most day trips from Hurghada visit two of them, typically the Giannis D and the Carnatic. The site is rated Advanced Open Water because of the depth and the current, which can be moderate to strong on the eastern side of the reef. The crossing from Hurghada takes 60–75 minutes by day boat, and the site is also a standard stop on northern Red Sea liveaboard itineraries.
What makes Abu Nuhas special is variety. The four wrecks are completely different in character, depth, and marine life. The Giannis D is dramatic and accessible. The Carnatic is atmospheric and heavily encrusted. The Chrisoula K is upright and navigable. The Kimon M is scattered and challenging. They share a reef but offer four distinct experiences, which is what makes Abu Nuhas worth repeat visits.
Giannis D: The Most Dived Wreck at Abu Nuhas
The Giannis D is a Greek cargo ship that ran aground in 1983. At 100 metres in length, she is the largest of the four Abu Nuhas wrecks and the most dived. She lies on her port side in three sections at 10–28 metres, split by the force of her impact with the reef. The bow is the shallowest and most accessible section, and it is where most divers begin the dive.
The bow is intact and dramatic, rising from the reef at an angle that makes it look like it is still sailing. The anchor winch and chains are visible, and the forward hold is open and accessible. The engine room, located amidships, is the highlight for penetration divers. It is a large, complex space with multiple levels, catwalks, and machinery still in place. The light filters in through portholes and gaps in the hull, creating beams that cut through the darkness. Glassfish school in extraordinary numbers inside the engine room, their silver bodies turning the space into a living cloud.
The stern section is deeper, around 25–28 metres, and more broken. The propeller is still attached, and the rudder is frozen at an angle. The stern hold contains the remains of the cargo, though it is less intact than the bow. The marine life on the Giannis D is typical of Abu Nuhas: glassfish in the interior, lionfish on the overhangs, moray eels in the crevices, and soft coral encrusting the exterior. The wreck is a photography favourite, the combination of structure, light, and marine life produces memorable images on almost every dive.
| Depth | 10–28m |
|---|---|
| Level | Advanced Open Water |
| Visibility | 15–25m |
| Lies | Port side, three sections |
| Highlights | Bow, engine room, glassfish clouds |
| Marine Life | Glassfish, lionfish, moray eels, soft coral |
Carnatic: The Oldest and Most Atmospheric
The Carnatic is the oldest wreck on Abu Nuhas and the most atmospheric. A British steamship that sank in 1869, she was carrying a cargo of wine, gold, and passengers when she struck the reef. The wine gave her the nickname "the wine wreck," though the gold was recovered by the British shortly after the sinking. She rests upside down at 16–27 metres, and after 150 years underwater, she is so heavily colonised by coral that she barely resembles a ship from the outside.
Inside is a different story. The cargo holds are vast, the light filters in at unusual angles through gaps in the hull, and the marine life has made every compartment its own. The wooden hull has long since rotted away, but the iron framework remains, and the coral growth on the exterior has created a reef structure that supports a diverse ecosystem. Glassfish and batfish school in the holds, and Napoleon wrasse patrol the exterior with the unhurried confidence of animals that have nothing to fear.
The Carnatic is the wreck that gets under your skin. There is something about the combination of age, coral coverage, and the quality of light inside the holds that makes every dive feel like an exploration. She is less visited than the Giannis D, which means you are more likely to have sections of the wreck to yourself. The penetration routes are not technical, but they require attention to buoyancy and fin technique, the silt inside the holds is easily disturbed and visibility drops quickly.
| Depth | 16–27m |
|---|---|
| Level | Advanced Open Water |
| Visibility | 15–25m |
| Lies | Upside down, intact |
| Highlights | Cargo holds, coral coverage, atmosphere |
| Marine Life | Glassfish, batfish, Napoleon wrasse, soft coral |
Chrisoula K: The Tile Wreck
The Chrisoula K is a Greek cargo ship that sank in 1981 carrying ceramic floor tiles from Italy to Saudi Arabia. The tiles are still scattered across the seabed around the wreck, and divers often surface with fragments in their pockets, a souvenir that is technically illegal to remove but impossible to enforce. The wreck sits upright at 14–28 metres, which makes it one of the more navigable wrecks at Abu Nuhas.
The superstructure is largely intact, and the visibility inside the holds is often better than expected because the cargo was non-organic and does not produce the silt that accumulates in holds containing timber or textiles. The Chrisoula K is less visited than the Giannis D, which means you are more likely to have sections of the wreck to yourself. The marine life is similar to the other Abu Nuhas wrecks: lionfish, scorpionfish, grouper, and moray eels. The upright orientation makes it easier to orient yourself, and the penetration routes are more straightforward than the Giannis D or the Carnatic.
| Depth | 14–28m |
|---|---|
| Level | Advanced Open Water |
| Visibility | 15–20m |
| Lies | Upright, largely intact |
| Highlights | Superstructure, scattered cargo tiles, holds |
| Marine Life | Lionfish, scorpionfish, grouper, moray eels |
Kimon M: The Most Challenging
The Kimon M is the least visited and most challenging of the four Abu Nuhas wrecks. A cargo ship that broke apart on impact, she lies scattered at 15–30 metres in a way that rewards patient, experienced divers willing to piece together what they are looking at. She is not the wreck for a first visit to Abu Nuhas, but for divers returning to the site, she offers a completely different experience from the other three.
The scattered nature of the wreck means that navigation is more complex. There is no single hull to follow, no obvious route. Divers must swim between sections, using the reef as a reference, and the current can be stronger here than on the other wrecks because the broken structure does not provide the same shelter. The marine life is different too: reef sharks and barracuda are more common at the Kimon M than on the other three wrecks, possibly because the relative isolation suits them. Large grouper rest in the scattered sections, and the lack of diver traffic means they are less skittish.
| Depth | 15–30m |
|---|---|
| Level | Advanced / Experienced |
| Visibility | 15–20m |
| Lies | Broken apart, scattered sections |
| Highlights | Isolated, uncrowded, complex navigation |
| Marine Life | Reef sharks, barracuda, large grouper |
Wreck Diving Safety: Rules That Save Lives
Respect the Wreck
Both the Thistlegorm and Abu Nuhas are designated war graves or protected sites. The Thistlegorm is a war grave, nine crew members died when she sank, and the wreck is protected under Egyptian law. Removing artefacts is illegal and morally indefensible. The Abu Nuhas wrecks are protected by the Hurghada Environmental Protection and Conservation Association (HEPCA), which installed mooring buoys to prevent anchor damage. Touching coral, removing items, or penetrating beyond your training level is not just dangerous, it is destructive.
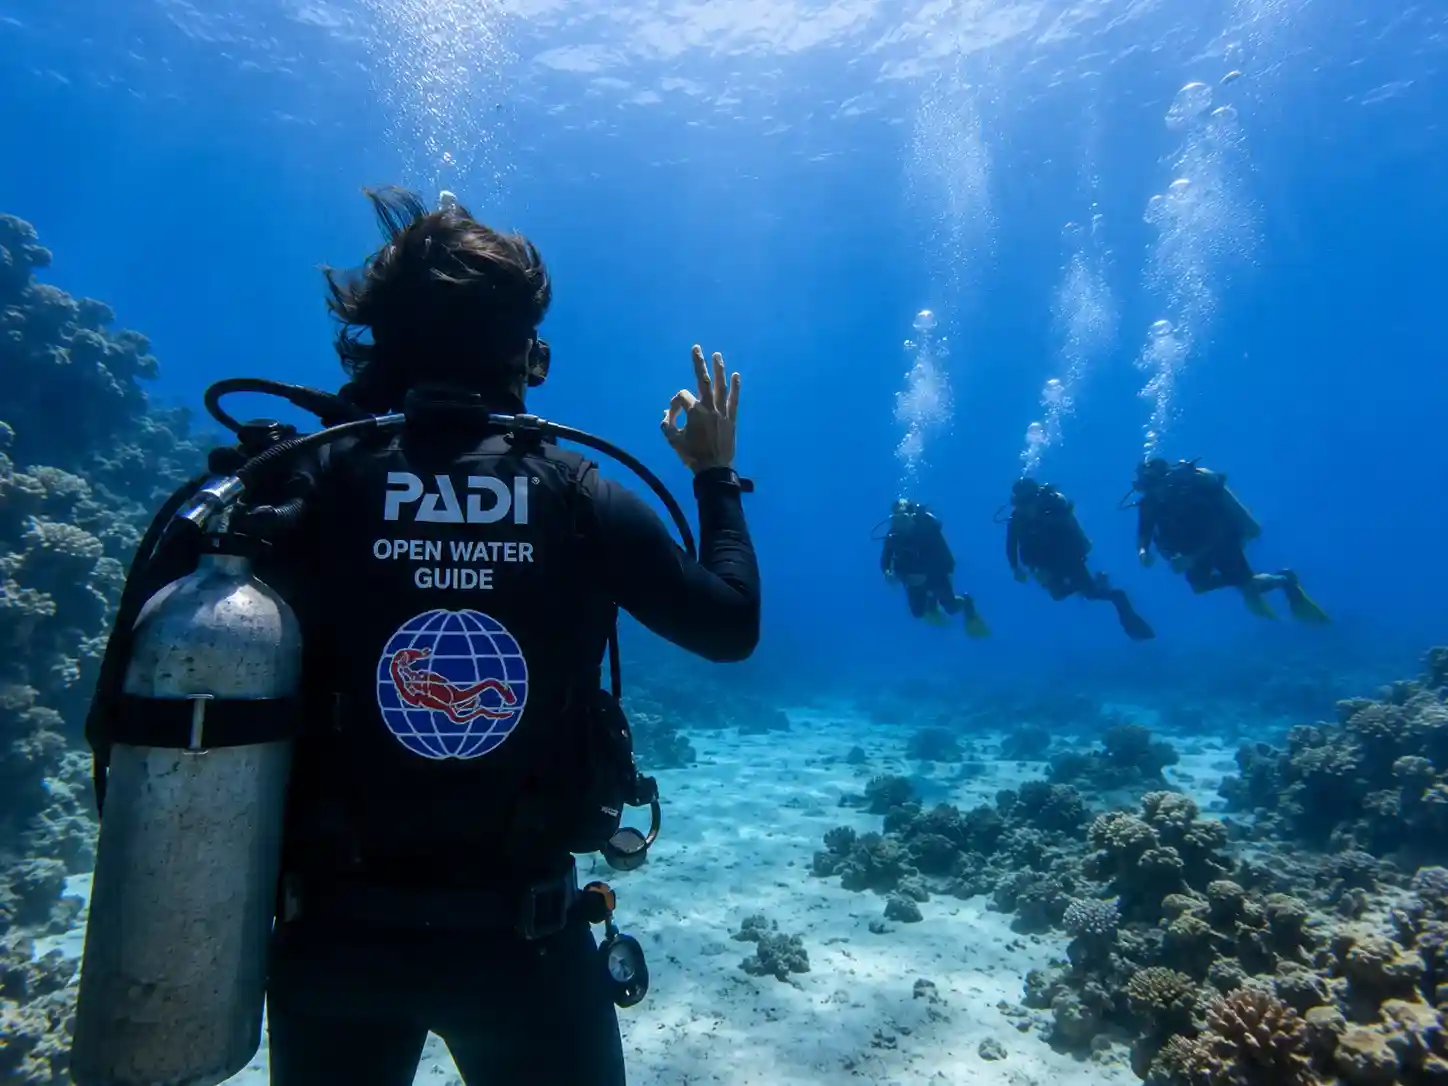
Know Your Limits
The Thistlegorm requires Advanced Open Water certification and a minimum of 20 logged dives. The Egyptian diving authority, CDWS, enforces this minimum. Abu Nuhas is rated Advanced Open Water for the depth and current. Penetration diving inside either site requires additional training. Most guides will assess your experience on the day and advise accordingly. Do not argue. A guide who refuses to take you into a penetration route is doing their job, not insulting your ability.
Current Awareness
Current is the primary hazard at both sites. At the Thistlegorm, tidal currents flow from northeast to southwest, and they can be strong enough to make swimming against them impossible. At Abu Nuhas, the current is strongest on the eastern side of the reef and around the Giannis D. Dive briefings cover current direction and strength, and guides adjust the dive plan accordingly. If you are not comfortable managing current, ask for a reef hook or stick to the sheltered side of the wreck.
Equipment Checks
Both sites are deep enough that equipment failure is not a minor inconvenience. A free-flowing regulator at 30 metres is an emergency. A leaking mask at 25 metres is a distraction that can lead to panic. Check your equipment before every dive, and carry a backup torch for penetration dives. The Thistlegorm is not a site where you want to discover that your primary torch battery is dead halfway through a hold.
Nitrox and Decompression
Nitrox is highly recommended for both sites. At the Thistlegorm, where most divers spend 45–50 minutes at 20–30 metres, Nitrox 32 extends no-decompression time significantly. At Abu Nuhas, where two dives on different wrecks are common, Nitrox reduces nitrogen loading on the second dive. Both sites are within recreational limits, but they are deep enough that decompression sickness is a real risk for divers who push their bottom time or surface too quickly. Follow your computer, do your safety stops, and ascend slowly.
Best Time for Wreck Diving
Thistlegorm
The Thistlegorm is diveable year-round, but the conditions vary. Summer (June–August) offers warm water and calm seas, but the site is crowded with day boats and liveaboards. Winter (December–March) offers the best visibility, often 30–40 metres, but the crossing from Hurghada can be rough and some days the site is simply not accessible by day boat. The best compromise is spring (April–May) or autumn (September–November), when the water is warm, the visibility is good, and the crowds are manageable. Liveaboards handle winter conditions better than day boats, and a liveaboard itinerary is the best way to experience the Thistlegorm in any season.
Abu Nuhas
Abu Nuhas is more exposed to wind than inshore sites, and the crossing from Hurghada can be uncomfortable in winter. Summer is viable but the afternoon winds can make the return journey rough. The best windows are April–May and September–October, when the sea is calm, the visibility is consistent, and the water temperature is comfortable for the 60–75 minute crossing. Early morning departures are standard in summer to reach the site before conditions deteriorate.
Frequently Asked Questions
Can I dive the Thistlegorm as a beginner?
No. The Egyptian diving authority (CDWS) requires a minimum of 20 logged dives and Advanced Open Water certification (or equivalent) to dive the Thistlegorm. The depth, current, and overhead environments make it unsuitable for Open Water divers. If you are a beginner, complete your Advanced Open Water and gain experience on shallower wrecks like Abu Nuhas before attempting the Thistlegorm.
How many dives do I need on the Thistlegorm?
At least two, ideally four. One dive is enough to see the highlights, the bow, the motorcycles, and the locomotives, but it is rushed. Two dives allow you to explore the stern section and attempt a penetration route. Four dives, typically on a liveaboard, allow you to see the wreck in detail, photograph it properly, and experience a night dive, which is entirely different from the day dive. We have done over fifty dives on the Thistlegorm and still see something new on every visit.
Can I take artefacts from the wrecks?
No. Removing artefacts from the Thistlegorm is illegal under Egyptian law and morally indefensible, it is a war grave. Removing artefacts from Abu Nuhas is also illegal and damages the site for future divers. The "souvenir" tile from the Chrisoula K that you are tempted to put in your pocket is part of the wreck's history. Leave it. Photographs are the only souvenirs you need.
Is the Thistlegorm safe to penetrate?
With proper training and a guide, yes. Without training, no. The holds are large and relatively open, but they are overhead environments with silt floors that reduce visibility to zero if disturbed. The structure is also deteriorating. The explosion that sank the ship weakened the hull, and decades of saltwater corrosion have taken their toll. Parts of the wreck that were stable ten years ago are now unsafe. A guide who knows the current condition of the wreck is essential.
Which is better: day trip or liveaboard?
For the Thistlegorm, liveaboard is better. The site is 3–4 hours from Hurghada by day boat, which means a long, exhausting day with only two dives. A liveaboard allows multiple dives, including a night dive, and the journey is part of the experience rather than a burden. For Abu Nuhas, a day trip is viable and common, the crossing is 60–75 minutes, which is long but manageable. Liveaboards also visit Abu Nuhas, but the day trip option is more practical for most divers.
Can I photograph the wrecks?
Both sites are excellent for photography. The Thistlegorm offers iconic subjects: motorcycles, trucks, locomotives, and the ship's structure. Abu Nuhas offers coral-covered wrecks, glassfish schools, and dramatic light inside the holds. Wide-angle lenses work best for the exterior shots and large interior spaces. A strobe or video light is essential for shooting inside the holds. The golden rule applies: never touch the wreck for stability. If your buoyancy is not solid enough to hold position while operating a camera, you are not ready to photograph that subject.
Ready to Dive the Wrecks of the Red Sea?
The Thistlegorm and Abu Nuhas represent two different kinds of wreck diving: one is a historical monument, the other is a natural reef that happens to have ships on it. Both are accessible from Hurghada. Both demand respect. Both reward the prepared diver with experiences that last a lifetime.
We run day trips to Abu Nuhas and liveaboard itineraries that include the Thistlegorm. Whether you want your first wreck dive or your fiftieth, we will match the site to your experience level and make sure you dive it safely. Get in touch and tell us what you are looking for.